Unlocking the Magic of Bakery-Style Halloween Chocolate Bread: Your Foolproof Guide
Halloween isn't just about costumes and carved pumpkins; it's a season brimming with enchanting aromas and delightful treats, especially those baked with love right in your kitchen. Imagine a homemade loaf that effortlessly blends the rich indulgence of chocolate with playful bursts of candy – a treat so good, your neighbors might just crown you the neighborhood's baking wizard. This year, ditch the store-bought disappointments and dive into making a truly unforgettable halloween chocolate bread that tastes like it came straight from a gourmet bakery. For many, the idea of baking bread can be intimidating. Visions of dense, flat loaves or melted, sticky candy turning into a sugary mess might haunt your culinary dreams. But fear not! We're here to unravel the "bakery secrets" that transform a simple recipe into a foolproof, festive sweet loaf that’s as fun to make as it is to devour. This comprehensive guide will empower you to create a perfectly tender, fudgy, and candy-studded festive Halloween bread that will be the star of any spooky gathering.The Foundation: Essential Ingredients and "Bakery Secrets" for Success
The journey to an irresistible halloween chocolate bread begins with understanding your ingredients. Think of them as the building blocks of your culinary masterpiece; quality here truly makes a difference.- Flour Power: Don't skimp on good all-purpose flour. A higher quality flour provides better structure and results in a lighter, more pillowy texture. Cheap, generic brands can lead to dense, sad loaves – a lesson many home bakers learn the hard way!
- Yeast is Your Friend (If It's Fresh!): Instant yeast is a miracle worker for busy bakers, but it has a shelf life. Always check the expiration date. Old, inactive yeast is the number one culprit behind flat bread that simply refuses to rise. Fresh yeast ensures that beautiful, airy texture.
- The Right Temperature Liquids: This is a critical "bakery secret" often overlooked. When adding milk to your dry ingredients, it should be warm to the touch, not hot. Think baby bottle temperature, around 105-115°F (40-46°C). Hot liquids will kill the yeast, preventing your bread from rising. Cold liquids will inhibit it.
- Richness from Butter: Melted butter adds incredible flavor and tenderness to your loaf. Don't substitute with oil unless specified, as butter contributes a unique richness.
- Chocolate Infusion: For that essential chocolatey goodness in your halloween chocolate bread, consider options like cocoa powder for a deep chocolate base, or a generous scoop of Nutella for a fudgier, more indulgent loaf. The Nutella method, in particular, yields an incredibly moist and rich crumb.
- Candy Selection: Not all candies are created equal for baking. Opt for mini chocolate chips, M&Ms, or chopped, sturdy candy bars (like Snickers or Milky Way). Avoid gummy candies or those that melt into a sticky, impossible mess. The goal is delightful pockets of sweetness, not a melted candy catastrophe.
Crafting the Perfect Dough: From Kneading to Rising
This is where the magic truly happens – transforming simple ingredients into a living, breathing dough.- Mixing Your Dry Ingredients: In a large bowl, whisk together your flour, instant yeast, sugar, and salt. This ensures even distribution before liquids are introduced.
- Bringing It Together: Gradually add your warm milk and melted butter to the dry ingredients. Stir with a sturdy spoon or spatula until a shaggy, somewhat rough dough forms. Don't worry if it looks unappealing at this stage; it's perfectly normal.
- The Art of Kneading: Turn your shaggy dough onto a lightly floured surface. Knead for 5-7 minutes. This step is vital for developing the gluten, which gives bread its structure and elasticity. A common baker's trick: the dough is ready when it’s smooth, elastic, and springs back when gently poked. Skipping this step leads to dense bread, so embrace the workout!
- First Rise – The "Bulk Fermentation": Place your kneaded dough in a lightly oiled bowl, turning once to coat. Cover with plastic wrap or a clean kitchen towel and let it rise in a warm, draft-free place until doubled in size, typically 60-90 minutes. This slow rise is crucial for flavor development and a light texture.
- Incorporating the Candy: This is a key "bakery secret" for halloween candy bread! After the first rise, gently punch down the dough to release the air. Turn it onto a lightly floured surface and flatten it slightly. Now, sprinkle your chosen Halloween candies evenly over the dough. Fold the dough over itself a few times, gently kneading just enough to distribute the candy without overworking the dough or causing the candies to melt prematurely. This technique ensures those delightful pockets of sweetness.
The Sweet Finish: Baking, Candy Integration & Spooky Decor
With your dough perfectly prepared, it’s time to bring your creation to life in the oven and then add some festive flair.Carefully shape your candy-studded dough into a loaf and place it into a prepared loaf pan. Cover it again and let it undergo a second, shorter rise (around 30-45 minutes) until it looks puffy and ready for the oven. This second rise ensures a light, airy loaf.
Bake your halloween chocolate bread in a preheated oven (usually around 350°F or 175°C) for approximately 50-60 minutes, or until golden brown and cooked through. A good indicator of doneness is when the internal temperature reaches 190-200°F (88-93°C). Once baked, let your loaf cool in the pan for a few minutes before transferring it to a wire rack to cool completely. Cooling on a rack prevents the bottom from becoming soggy.
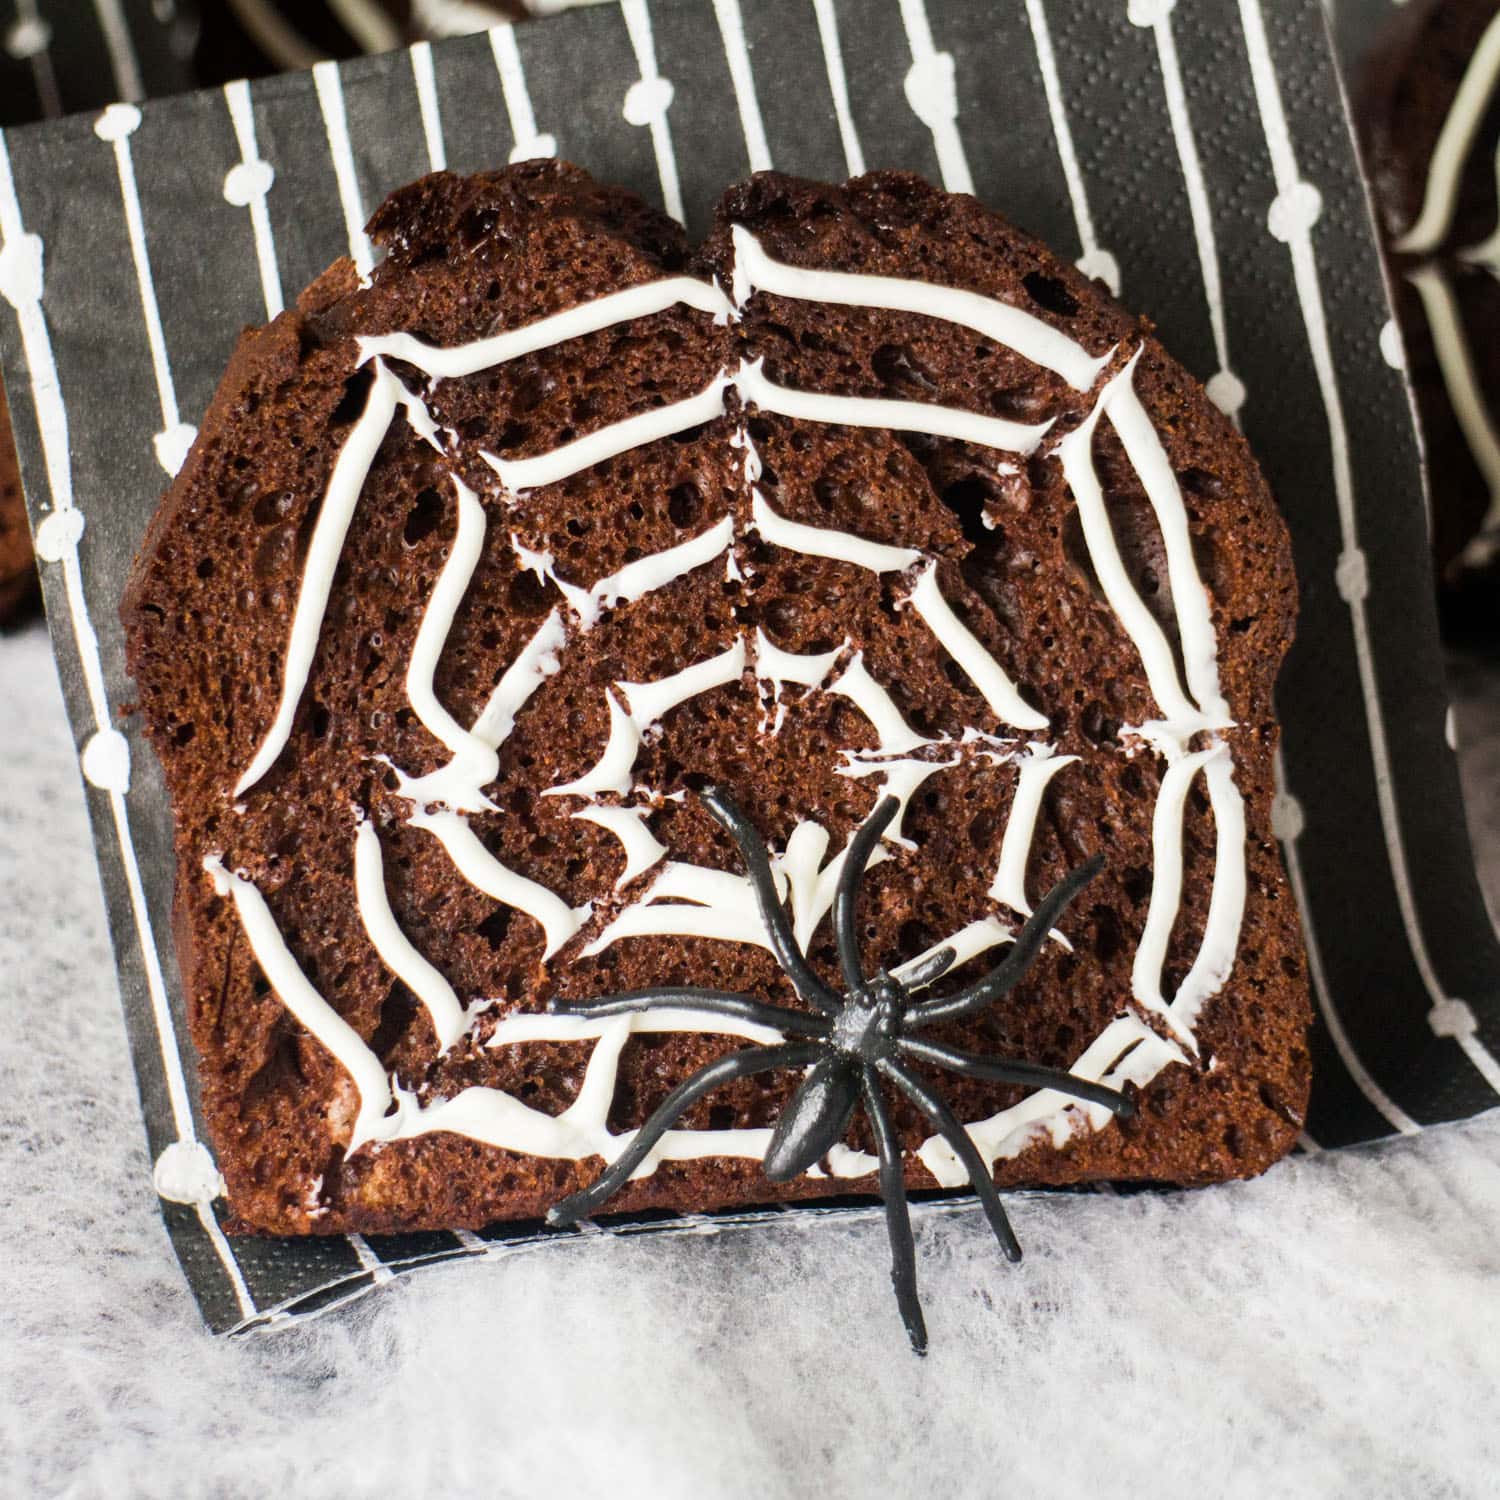
Now for the fun, Halloween-specific touches! While your delicious loaf is cooling, prepare your chosen decorations. A simple yet highly effective way to add a festive touch is with vanilla frosting spiderwebs. Place your favorite vanilla frosting into a piping bag fitted with a small round tip, or simply snip a tiny corner off a freezer-safe plastic bag. Pipe concentric circles on the top of the cooled loaf, then drag a toothpick from the center outwards to create a spiderweb effect. For more detailed instructions on this spooky yet sweet decoration, check out our guide on Easy Halloween Chocolate Bread: Fudgy Loaf with Spiderweb Frosting.
